gitLab安裝
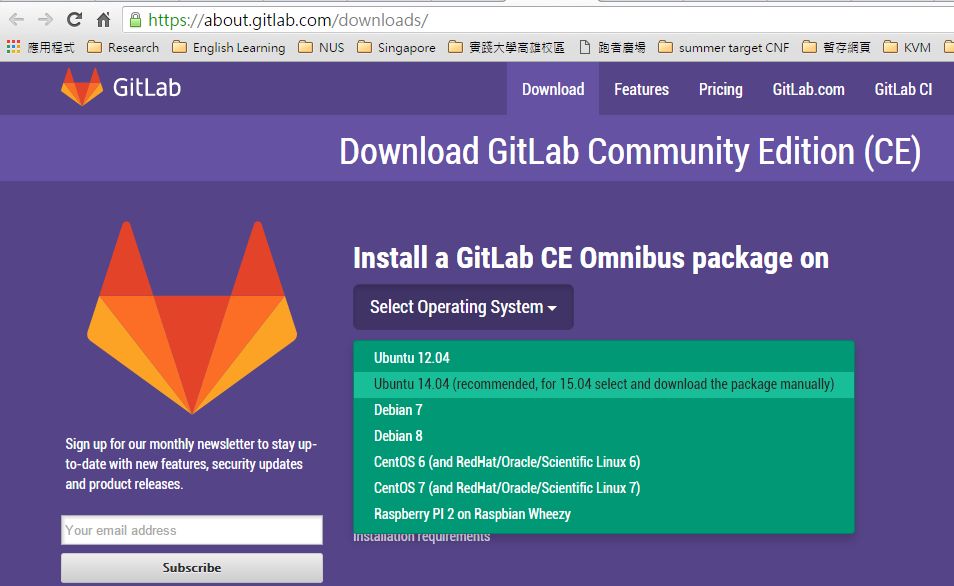
直接使用官方網站的安裝,https://about.gitlab.com/downloads/
選擇作業系統
依照指示來操作
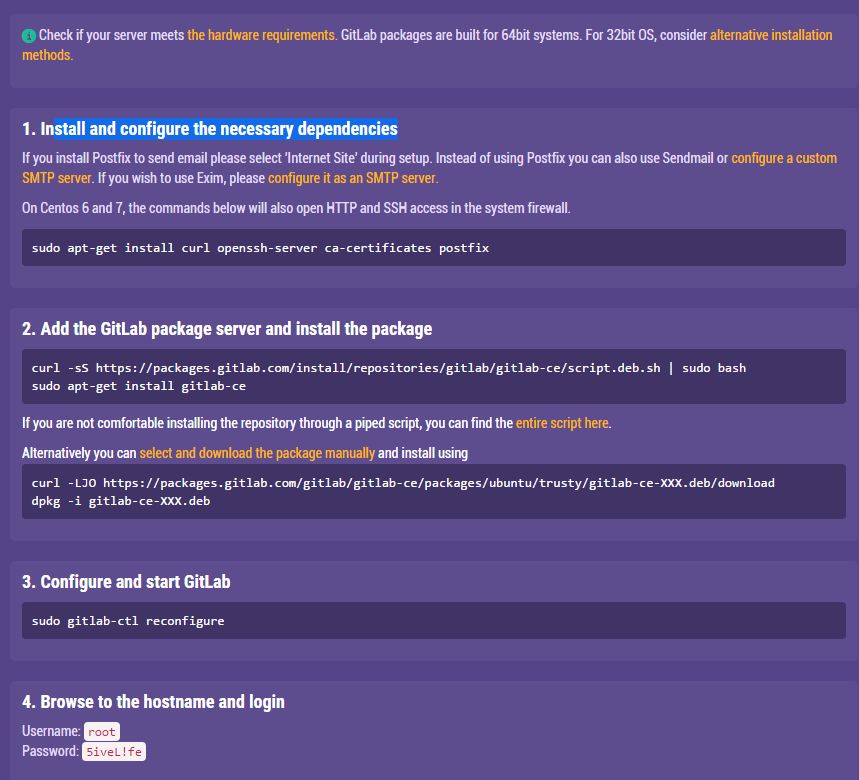 a.安裝跟組態需要的套件
sudo apt-get install curl openssh-server ca-certificates postfixb.下載安裝檔並執行
curl -sS https://packages.gitlab.com/install/repositories/gitlab/gitlab-ce/script.deb.sh | sudo bash
sudo apt-get install gitlab-ce
c.修改gitlab的啟動埠號,因為gitlab提供網頁操作環境,會與既有的網頁衝突,所以建議修改啟動埠號 編輯/etc/gitlab/gitlab.rb這個檔案中的external_url,修改成自己的主機及埠號
...
external_url 'http://xxx.kh.usc.edu.tw:8000'
...
d.組態並啟動gitLab
sudo gitlab-ctl reconfigure
e.開啟網頁開始登錄,先輸入預設帳密(root/5iveL!fe)
啟動與關閉gitLab
# Start all GitLab components
sudo gitlab-ctl start

# Stop all GitLab components
sudo gitlab-ctl stop

# Restart all GitLab components
sudo gitlab-ctl restart
troubleshoot
Q1: 502 Whoops, GitLab is taking too much time to respond
有可能是因為gitlab除了本身所設定的埠號,還有authBackend會另外開一個埠號,如果這個port被佔用,就會出現上述問題。
Ans:
ps aux | grep 8080  # 先檢查是否有指令使用到該port
sudo netstat -nlpa | grep 8080 # 檢查是否有程式已使用該port
sudo vi /etc/gitlab/gitlab.rb # 修改gitlab設定,錯開8080,改為8081
...
gitlab_workhorse['auth_backend'] = "http://localhost:8081"
...
sudo gitlab-ctl reconfigure #重新編譯並啟動gitlab
參考資料
- Maintenance commands, http://doc.gitlab.com/omnibus/maintenance/README.html
- GitLab 快速安裝, https://blog.wu-boy.com/2014/12/easy-to-install-gitlab-quickly/
- Ubuntu 安裝 Gitlab, http://www.arthurtoday.com/2015/05/ubuntu-install-gitlab.html
- Pro git, https://git-scm.com/book/zh-tw/v2